June 24, 2020
Before using the i1iO table, the manufacturer's driver for the i1Pro 3 needs to be installed. Install the X-Rite software that came with the i1Pro 3 and after the software has been installed, connect the i1Pro 3 to the PC. The i1Pro 3 is then ready for use with Wasatch SoftRIP, and the i1Pro 3 device can be inserted into the i1iO table.
For more information, consult the documentation provided by X-Rite.
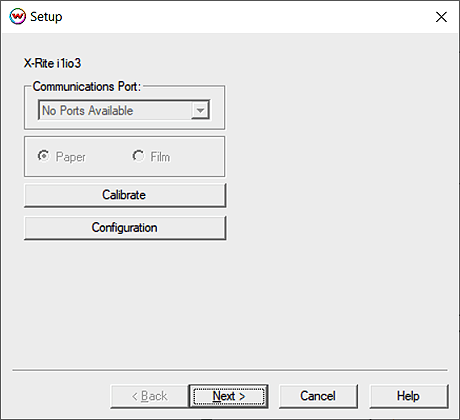
From the Print Setup window (blue gears), select Edit followed by Color Transforms. Next, select Calibration and choose Calibration Curves. Click on Densitometers and select the X-Rite i1iO3 from the list. The following screen will be displayed:

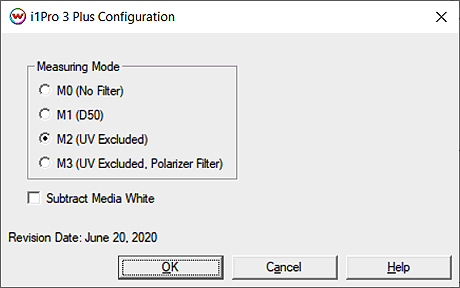
Clicking on the Configuration button will launch the following screen:

Clicking on the Calibrate button is required before scanning the target patches.
After clicking on the 'Calibrate' button, the i1iO arm will retract to its default position and scan the white tile. Once the calibration has finished, the message 'Calibration Complete' will be displayed. Click the 'Next' button.
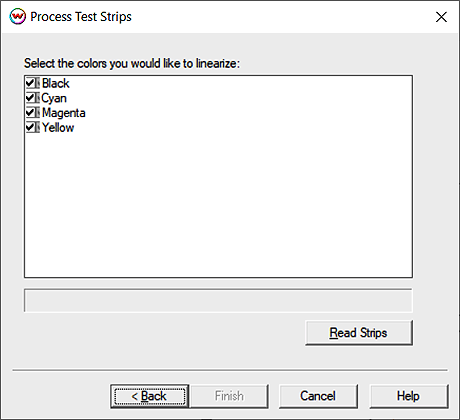
The following screen lists all the color channels. By default all the channels will be selected for scanning, but if certain colors do not need to be scanned then they can be deselected by clicking on the checkmark.

NOTE: The appropriate test pattern for scanning is the 'i1io3.PS' file and is located in the 'x:\PSFILES\' folder, (where x: is the hard drive that Wasatch SoftRIP is installed). This file has 17 data points and is the only test pattern that will give correct results.
When ready to proceed, click the Read Strips button.
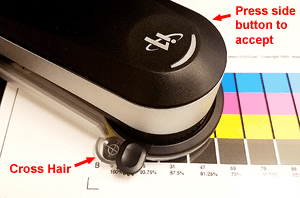
SoftRIP will prompt to have three reference points entered (Marked by A, B, and C).

Reference points A, B, and C (center of square patches)
Move the arm so that the 'cross hair' is centered in each of the corner patches (A, B, C). Press the button on the side of the i1Pro3 to accept each point.

If the scan is unsuccessful, a message will be displayed asking to re-scan the row or cancel the entire process. If the second scan also fails, a final reading of each patch will be made by scanning the individual patches separately.
After all the rows have been read, the button labeled Finish will be available.
NOTE: You may click Finish after reading any of the strips, only colors that were measured will be applied. Any colors you did not measure, will not be overwritten should curves already exist.