Nix MINI 3 / SPECTRO L
November 6, 2023
The Nix MINI 3 and SPECTRO L can be used with the Wasatch SoftRIP Color Neighborhood (located on the Color drop-down menu) or when performing a spot color replacement (with CIE LAB selected as the replacement color space). When accessing these tools, please use the following instructions to use the Nix MINI 3 with SoftRIP.
Installation
After connecting the Nix device to the PC with the provided USB cable, before it can be used for spot color capture in SoftRIP, please follow the instructions below to obtain the value encoded in the QR code printed on the Diagnostics Tile.
This value will then be entered into the Nix Configuration in SoftRIP. As the value is very long it is not recommended to enter it into SoftRIP manually.
This value can be obtained by using a camera app on a smart phone. Skip the Windows 10 / 11 Camera app instructions to see more on smart phone acquisition.
- Windows 10 / 11 Camera app instructions
- Open the Camera app in Windows 10 / 11. Click on Search on the Windows Taskbar and type 'Camera'.
- Click on the gear icon in the upper-left corner of the app to open the settings menu.
- Click on the "Related settings" drop-down menu and enable the "Try out new experimental features" toggle. This will allow you to access the QR code scanning option in the camera app.
- Restart the camera app and select the QR code scanning mode on the right side of the app. It looks like a square with four smaller squares inside it.
- Hold the printed QR code in front of your computer's camera and make sure it fits within the camera frame. The camera app will automatically scan the QR code and display the information encoded in it on your screen. Click on the value to copy it to your clipboard.
- In SoftRIP click on the Color drop-down menu and select "Color Neighborhood".
- Click on the multi-colored button to the right of "Spot Color Capture" and select the Nix Series device. Then click the Spot Color Capture button.
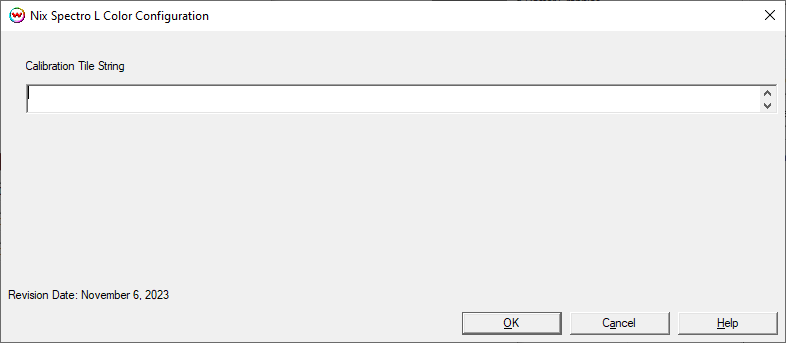
- Click the Configuration button. Right-click in the provided space and left click to paste the value copied to the clipboard and click OK to save. see window below.
- Smart Phone Acquisition Instructions
- If using a smart phone to obtain the QR code value from the Nix Diagnostics Tile, once acquired in this manner it then needs to be transferred to the PC so that it can be copied into the SoftRIP configuration.
- Common ways one can transfer the value to the PC from a smart phone are to paste it into a smart phone email app and send it to an account accessible on the PC. Alternatively, if one has access to a cloud based notes application that can be accessed on both the phone and PC this can be used to transfer the value.
Calibration
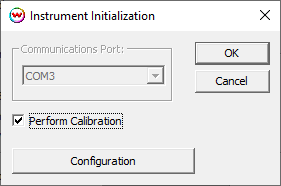
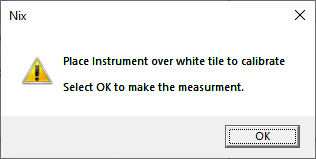
Calibration is required before scanning the target. Be sure to place the Nix device on the included Diagnostics Tile before clicking OK when prompted to Calibrate the device.
If more than one spot color is measured, subsequent measurements do not require calibration between measurements. Calibration is only necessary once per measurement session.
Scanning the target
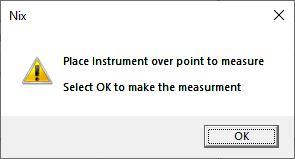
After calibration is complete, place the device on the surface color to be measured and click OK.