 HP Designjet L25500
April 14, 2011
Printer Properties:
Pressing the Properties button next to the Printer Model window on the
Imaging Configurations screen will launch a control panel for this printer.
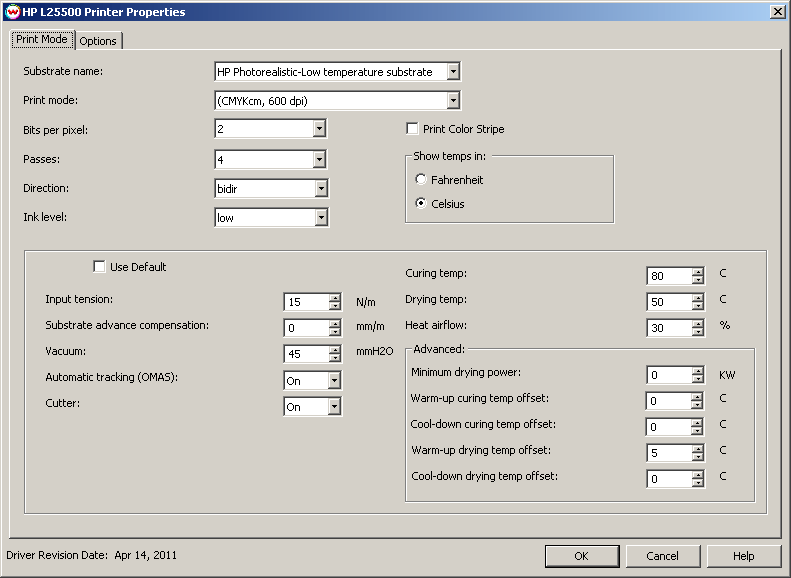
- Substrate name: Select the generic media type loaded on the printer.
- Print mode: Select the inkset and resolution.
- Bits per pixel: 1 bit for fixed droplet mode. 2 bit for variable droplet mode.
- Passes: Select the desired pass count.
- Direction: Print unidirectional or bidirectional.
- Ink level: Choose high or low ink amount.
- Print Color Stripe: Enabling this option will print bands of each color on the edge of the print.
- Show temps in: Choose which scale temperatures will be displayed. Fahrenheit or Celsius.
- Use Default: Each generic media type has default settings. To use the defaults, keep this control checked. Uncheck to change the settings to the following:
- Input Tension: Tension placed on roll at input. Measured by N/m.
- Substrate advance compensation: After printing the substrate advance test pattern from the printer front panel, place appropriate value here.
- Vacuum: The vacuum applied to the media on the printing platen to hold it down. Measured by mmH2O
- Automatic tracking (OMAS): Turn automatic tracking of media advance on and off.
- Cutter: Enable cutting of material after each print job.
- Curing temp: Set curing temp
- Drying temp: Set drying temp
- Heat airflow: Set heat airflow in %.
- Minimum drying power: Set minimum drying power in KW.
- Warm-up curing temp offset: Set warm-up curing temp offset
- Cool-down curing temp offset: Set cool-down curing temp offset
- Warm-up drying temp offset: Set warm-up drying temp offset
- Cool-down drying temp offset: Set cool-down drying temp offset
Options
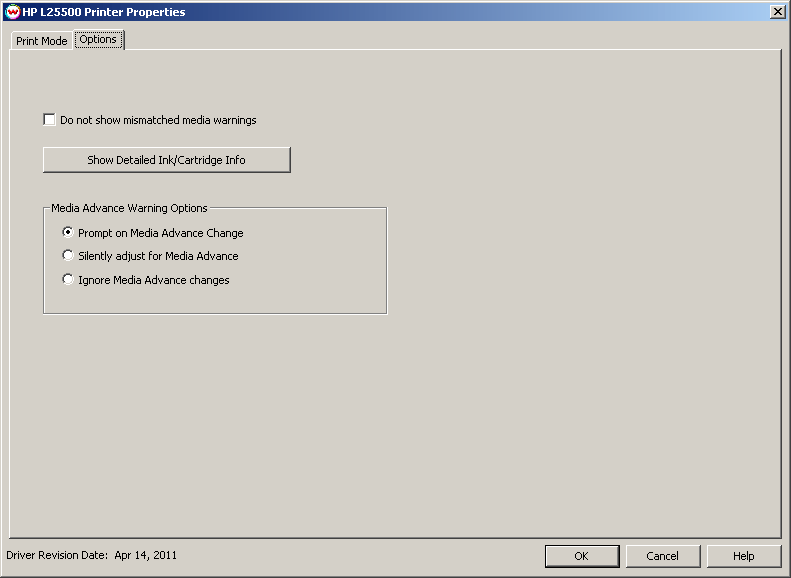
- Do not show mismatched media warnings: Disable prompt when media type in SoftRIP does not match media type selected on front panel of the printer.
- Show Detailed Ink/Cartridge Info: Pressing this button displays detailed information about the print heads and ink cartridges loaded into the printer.
- Media Advance Warning Options: When Media Advance is adjusted on the front panel of the printer, SoftRIP can do one of the following once the print job is complete.
- Prompt on Media Advance Change: Will prompt to save the change.
- Silently adjust for Media Advance: Will save the change without prompt.
- Ignore Media Advance changes: Will not save any changes and will not prompt.
Densitometry
After selecting the 'HP Designjet Calibration' from the Color drop down menu you will see a window similar to what is shown below.
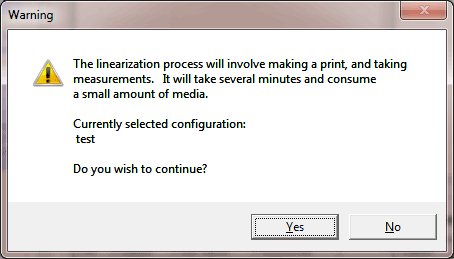
Ensure the paper type setting on the front panel matches the Media Type setting on the properties page of the driver in SoftRIP, and the physical connection is correct. Click 'Yes' and the printer will start printing the linearization target and scan the target after the dry time. Once the printer is done scanning the target a 'Save Imaging Configuration' prompt will be shown allowing the scanned data to be saved as part of the current Imaging Configuration or to a new one.
NOTE: Total time for the linearization process may exceed 20 minutes.
Imaging Configuration Creation Tips for the HP L25500
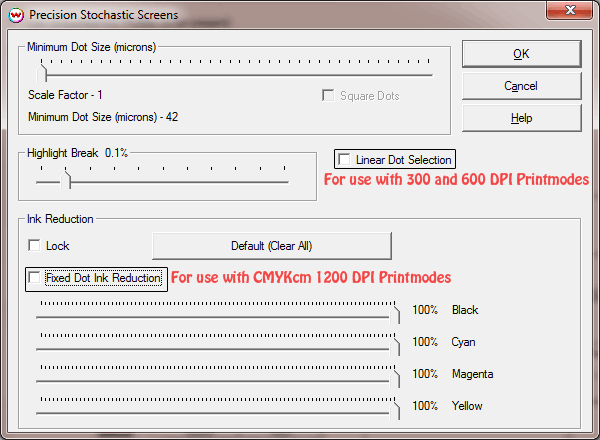
- When using 300 and 600 DPI print modes, better results may be obtained by using the Linear Dot Selection control available in the Halftone Properties of Precision Stochastic Screens. When using the print mode CMYKcm at 1200 DPI it is recommended to use the Fixed Dot Ink Reduction control, which is also available in Halftone Properties for Precision Stochastic Screens (see screen shot below.)
- In cases where inks do not mix well or bleed at higher ink densities, it is recommended to either perform an individual channel ink reduction or to increase the pass count in the printer properties.
- When an external densitometer is available for use, often the speed and results that can be obtained from it's use instead of using the internal densitometer will be superior.
- Superior results can be obtained by performing a total ink limit within the ICC profiling software when generating the output profile instead of using the control available in SoftRIP's Color Transforms.
- For more general instructions to create quality Imaging Configurations with SoftRIP, please visit this link.