 Mutoh ValueJet 1638
April 29, 2013
Print Settings:
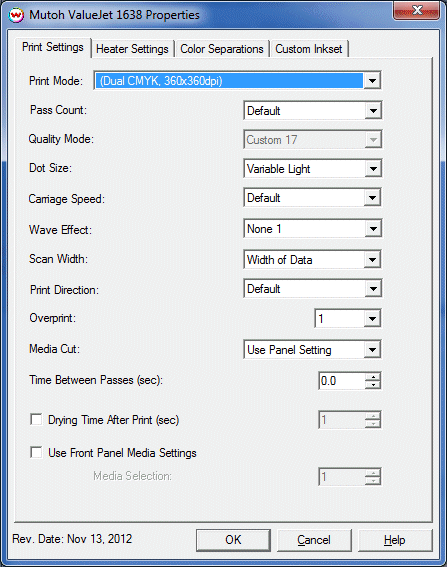
Pressing the Properties button next to the Printer Model window on the Imaging Configurations screen will launch a control panel for this printer.

- Print Mode: Select the ink type and printing resolution.
- Pass Count: Set desired pass count.
- Quality Mode: Select the Quality Mode. This will change the default settings for Interlace Pass, Carriage Speed, and Ink Jetting Direction.
- Dot Size: Select the size of the dot.
- Carriage Speed: Set speed of carriage during printing.
- Wave Effect: Select the wave pattern to print with.
- Scan Width: Select width for the print head passing from Media, Data, or Printer.
- Print Direction: Print in both directions (bi) or one direction (uni).
- Overprint: Prints over the printed area the selected number of times. For example, if 2 is selected, the amount of ink laid down is double. The maximum value is 9.
- Media Cut: Enable or disable cutting as well as how the media will be cut after printing is complete.
- Time Between Passes: Time Between Passes allows you to set a drying time between each pass. This is especially useful when printing on film.
- Drying Time After Print: Time print will sit on heaters after printing, before media is cut (if enabled).
- Use Front Panel Media Settings: Allows the print to select one of its predefined front panel Media Settings, without having to switch the front panel over to this media setting on the front panel.
Heater Settings:
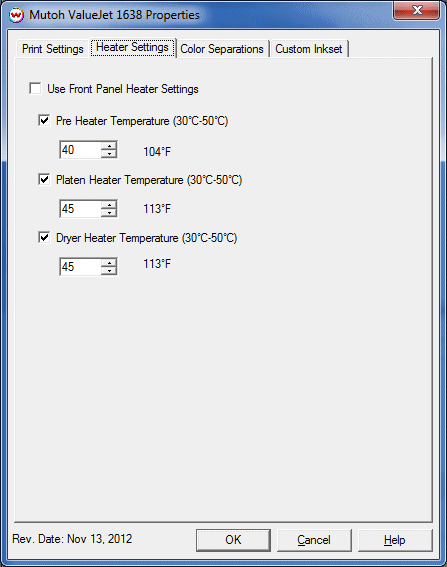
When you click on Heater Settings, the following Properties page will be displayed:

The Heater Settings page allows you to adjust the heater settings.
- Checking 'Use Front Panel Heater Settings' disables driver heater controls and uses the printer's front panel settings instead.
- Check boxes on individual heaters allow one to turn each heater on or off.
- Adjust heater temperature in degrees centigrade.
Color Separations:
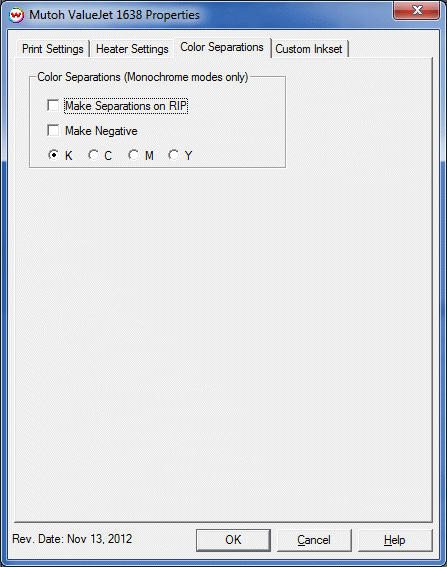
When you click on Color Separations, the following Properties page will be displayed:

- Make Separations on RIP: This control will separate colors during the rip process.
- Make Negative: This control will convert image to a negative.
- K, C, M, Y: This control will set which channel will be printed.
Custom Inkset:
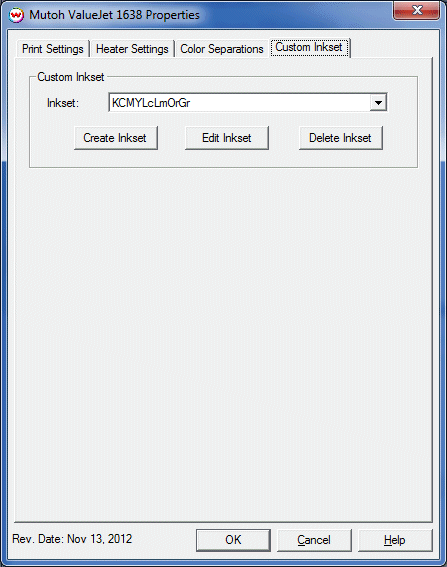
When you click on Custom Inkset, the following Properties page will be displayed:

For more information on creating custom inksets, click here.
When creating a custom inkset, the Assignments control should list the ink in the following order in relation to the ink slots on the back of the printer. 1=1, 2=3, 3=6, 4=7, 5=2, 6=4, 7=5, 8=8. For example if the ink is installed in the printer slot 1-8 as K,C,M,Y,Lc,Lm,Red, Blue then the Assignments control in the custom inkset should be 1-8 K, M, Lm, Red, C, Y, Lc, Blue. See chart below.
Assignment Slot
in custom inkset creator |
Printer Ink
Slot # |
| 1. K
|
1. K
|
| 2. M
|
2. C
|
| 3. Lm
|
3. M
|
| 4. Red
|
4. Y
|
| 5. C
|
5. Lc
|
| 6. Y
|
6. Lm
|
| 7. Lc
|
7. Red
|
8. Blue
|
8. Blue
|
 Mutoh ValueJet 1638
 Mutoh ValueJet 1638


