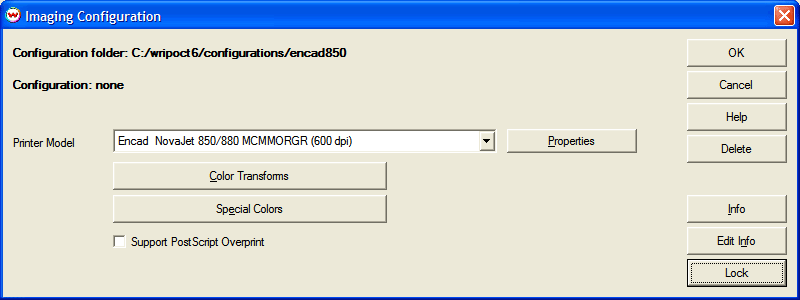
Illustration 1: Launching the Color Transforms screen
| HOT KEYS (SHORT CUTS) RELATED TO THE COLOR TRANSFORMS Screen | |||||||||||||||||||||||
|
|
||||||||||||||||||||||
The Color Transforms screen, shown in Illustration 2 below, is launched by pressing the Color Transforms button on the Imaging Configurations screen (Illustration 1).

Illustration 1: Launching the Color Transforms screen
The Color Transforms screen provides ICC profile-based color management across the entire production workflow. The features on this screen allow you to create and apply correction curves for incoming files and select custom ICC profiles for both incoming data and output devices. Whenever you make changes to your color settings, the flowchart on the Color Transforms screen dynamically changes to visually describe the processing that will take place.
Also on this screen are the controls for Halftone Methods, access to the Calibration utility, access to Color Separation Rules and additional controls for Ink Limiting.
| SAVING NEW IMAGING CONFIGURATIONS: Remember that when you make any changes to the settings shown on the Color Transforms screen (including correction curves), you must save these changes as a new (re-named) Imaging Configuration. In order to accomplish this, you must exit the Color Transforms screen by pressing the OK button. When you exit the Color Transforms screen, you will be returned to the Imaging Configurations screen. You must then exit Imaging Configurations with the OK button as well, or you will lose your changes. When you exit the Imaging Configurations screen, the Imaging Configurations - Save As window will be launched. The workings of this menu are described in more detail on the Imaging Configuration page of online help. |
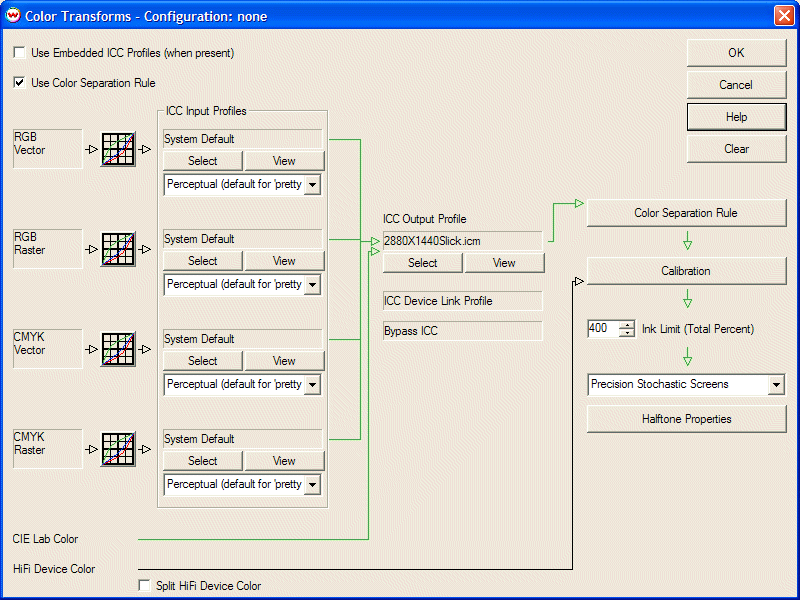
Illustration 2: Color Transforms screen with typical color configuration
Incoming data is divided into four classes
Separate correction curves, ICC input profiles and rendering intents can be specified for any or all of these categories, as described below:
Clicking the correction curves icon next to any of the four input categories will launch the Color Corrections window shown in Illustration 3. This window is the same as the one launched from the main Color menu at the top of the Main Screen, except that the type of input is already specified in the Correction Curves area (in this case RGB Raster). Adjustments to overall lightness and darkness (all channels) or individual hue channels are made using this tool. A more detailed description is found in the Color Corrections section of online help.
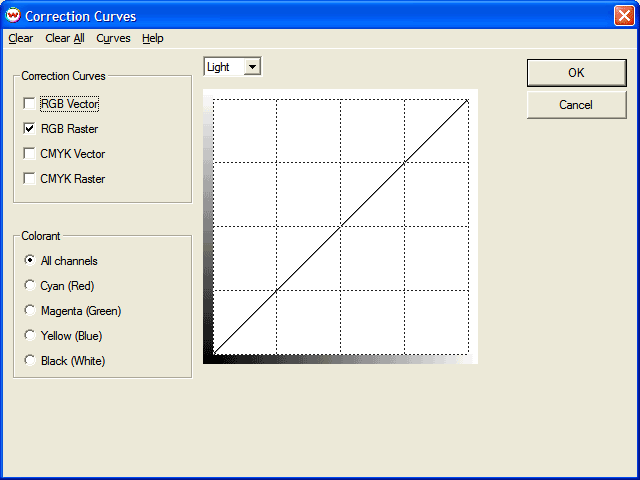
Illustration 3: Correction Curves window
You may provide custom input profiles for any of the four incoming file categories. This feature is located in the ICC Input Profiles area of the Color Transforms screen (see Illustration 4, below). For each input category, the profile in use is displayed at the top of the control area. This may be a default profile shipped with SoftRIP, or a custom profile provided by you. Changing input profiles is a very powerful tool and can have a significant affect on image quality.
To load a new profile, press the Select button. From the new window, select Browse to access your hard drive and load a new custom profile. You may also select None, for no profile, or choose the System Default profile.
Pressing the View button next to the Select button launches the Profile View feature, which displays a 3D model for the color space you have selected. This feature is described in more detail here.
You can select a Rendering Intent for the new ICC profile by using the drop down window in the ICC profile control for each input category.
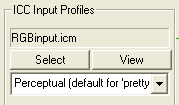
Illustration 4: ICC Input Profiles controls
The output profile describes the color space of the printing scenario, including the printer, inkset, media, configuration, calibration, and other settings. Custom Output Profiles can be loaded using a control similar to those for the input profiles. Load a new ICC Output Profile by pressing the Select button under the ICC Output Profile header. This will allow you to access whatever custom profiles you have stored on your hard drive. The View button launches the Profile View as in the ICC Input Profile controls described above.
The flowchart schematic connecting the various components of the color management workflow will change to reflect the way color will be processed through the system. Illustration 5 shows a more complex workflow in which custom profiles have been applied to the RGB and CMYK incoming data while the CMYK vector data is by-passing all color management including input and output profiles.
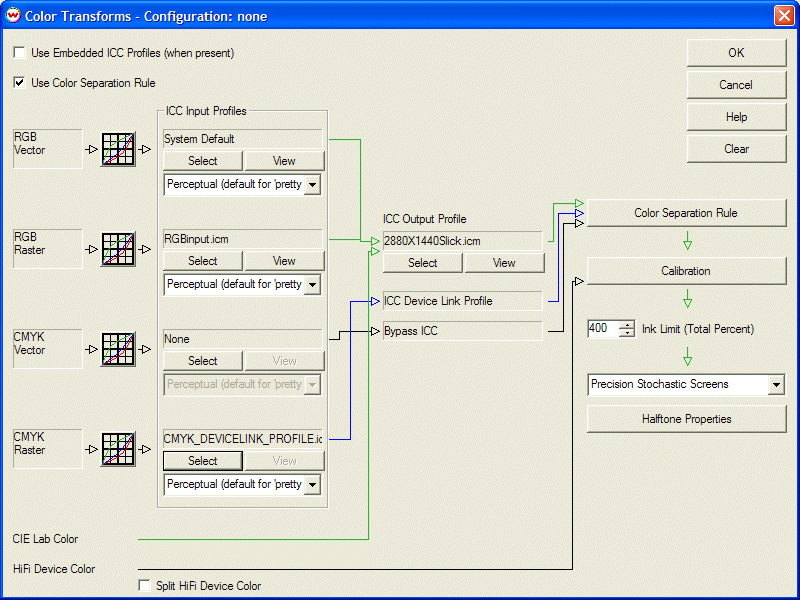
Illustration 5: Color Transforms menu with more complex color workflow configuration
This powerful control is most commonly used to allow Hi-Fi color devices with ink sets such as CMYK plus Orange, Green, Red, Blue or other ink colors to be profiled as RGB or CMYK devices. It is also very useful for intelligent ink limiting. On the Color Transforms screen, the Color Separation Rules button is activated by checking the Use Color Separation Rule box in the upper left of the menu. When you check this box, you will see changes in the flowchart arrow in the ICC workflow areas of the menu.
When you click on the Color Separation Rule button, the Color Separation window is launched. The functions of the window are explained in further detail here.
This button launches the Calibration window, which allows you to improve system performance by linearizing the printer and print condition. This process is described on the Calibration page of online help.
This control establishes a maximum that the total ink may not exceed. On a CMYK printer, the highest available setting will be 400%, (which corresponds to no limit at all). Setting a limit in the range of 150% to 350% can prevent ink acceptance problems on many media. Settings above 200% will typically improve ink acceptance problems without significantly reducing color gamut. While SoftRIP will allow setting below 100% (with 50% the minimum), settings under 150% should be used with great caution.
When this box is checked, SoftRIP will apply any embedded ICC profiles found in the four input data categories instead of the selected Input Profile.
This dropdown window allows you to change the Halftone Method applied to the Imaging Configuration. Additional controls are launched for most Halftone Methods by pressing the Halftone Properties button beneath the dropdown window. Halftone methods and their controls are explained on the Halftone Methods page of online help.
This control is for use with files that specify non-managed colors, such as white ink, and is discussed at length under "HiFi Color Workflows".